Outlook Installation
This article covers the server installation and configuration for the Outlook Add-In starting from OpenTalk Version 25.2.0.
A user guide can be found under Outlook.
Docker Configuration
In the .env file, the section for the Outlook add-in must be uncommented:
OUTLOOK_IMAGE_SRC="registry.opencode.de/opentalk/opentalk-outlook-add-in"
OUTLOOK_IMAGE_TAG=0.1.5
OPENTALK_OUTLOOK_URL="https://${OT_DOMAIN}/outlook"
OPENTALK_OUTLOOK_WEBAPP_URL="https://${OT_DOMAIN}"
OPENTALK_OUTLOOK_OIDC_CLIENT_ID="outlook"
OL_EXP_PORT=8084
OL_PORT=80
If you already have an existing installation, follow the entries from the env.sample file.
Reverse Proxy - nginx
An example configuration can be found under extras/nginx-samples/frontend_with_outlook-addin.conf.sample or in git
Here, server_name must be set to the OpenTalk domain.
For testing, visit https://mydomain.org/outlook/manifest.xml to check if you get the file.
Keycloak Configuration
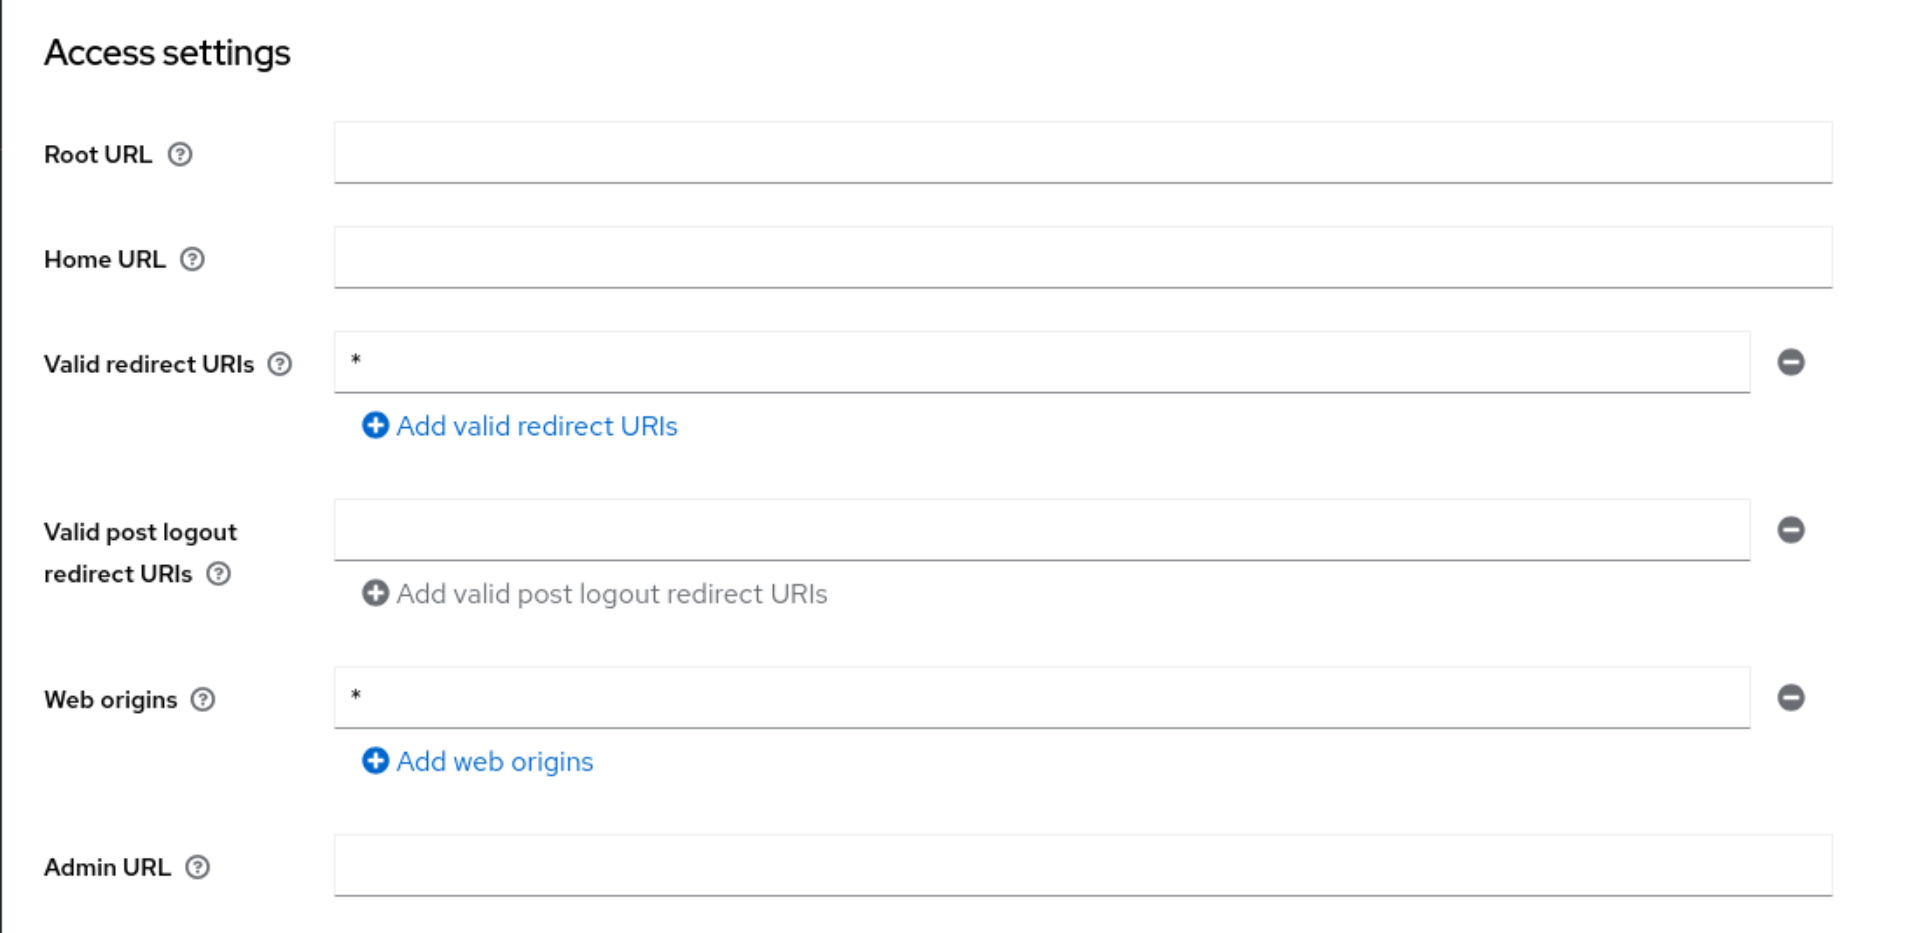
A new OIDC client with the following settings is required. The name should be "outlook".
Adjust the timeouts and other security settings (especially CORs settings) to your needs.
Allow CORs:
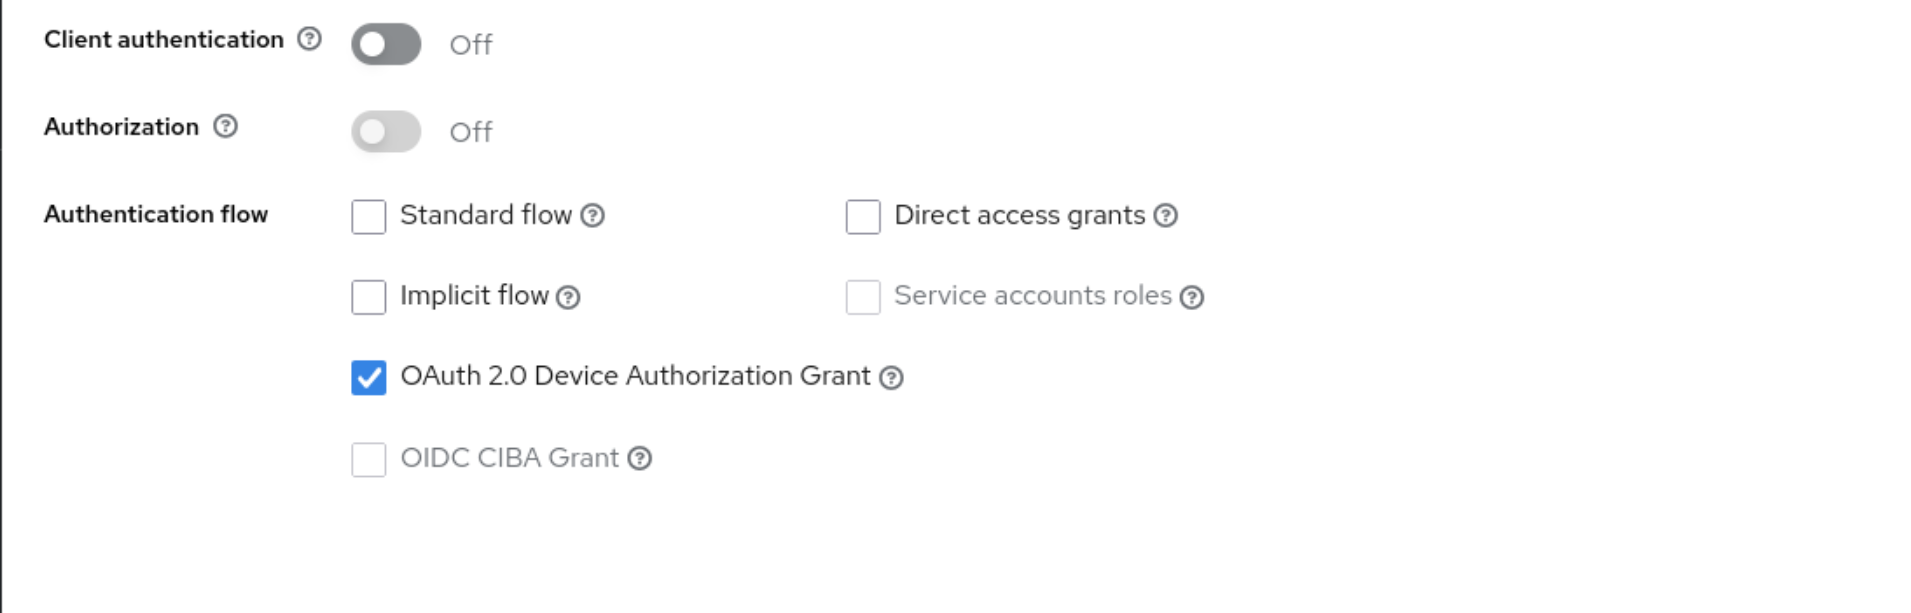
Disable everything except OAuth 2.0 Device Authorization Grant:
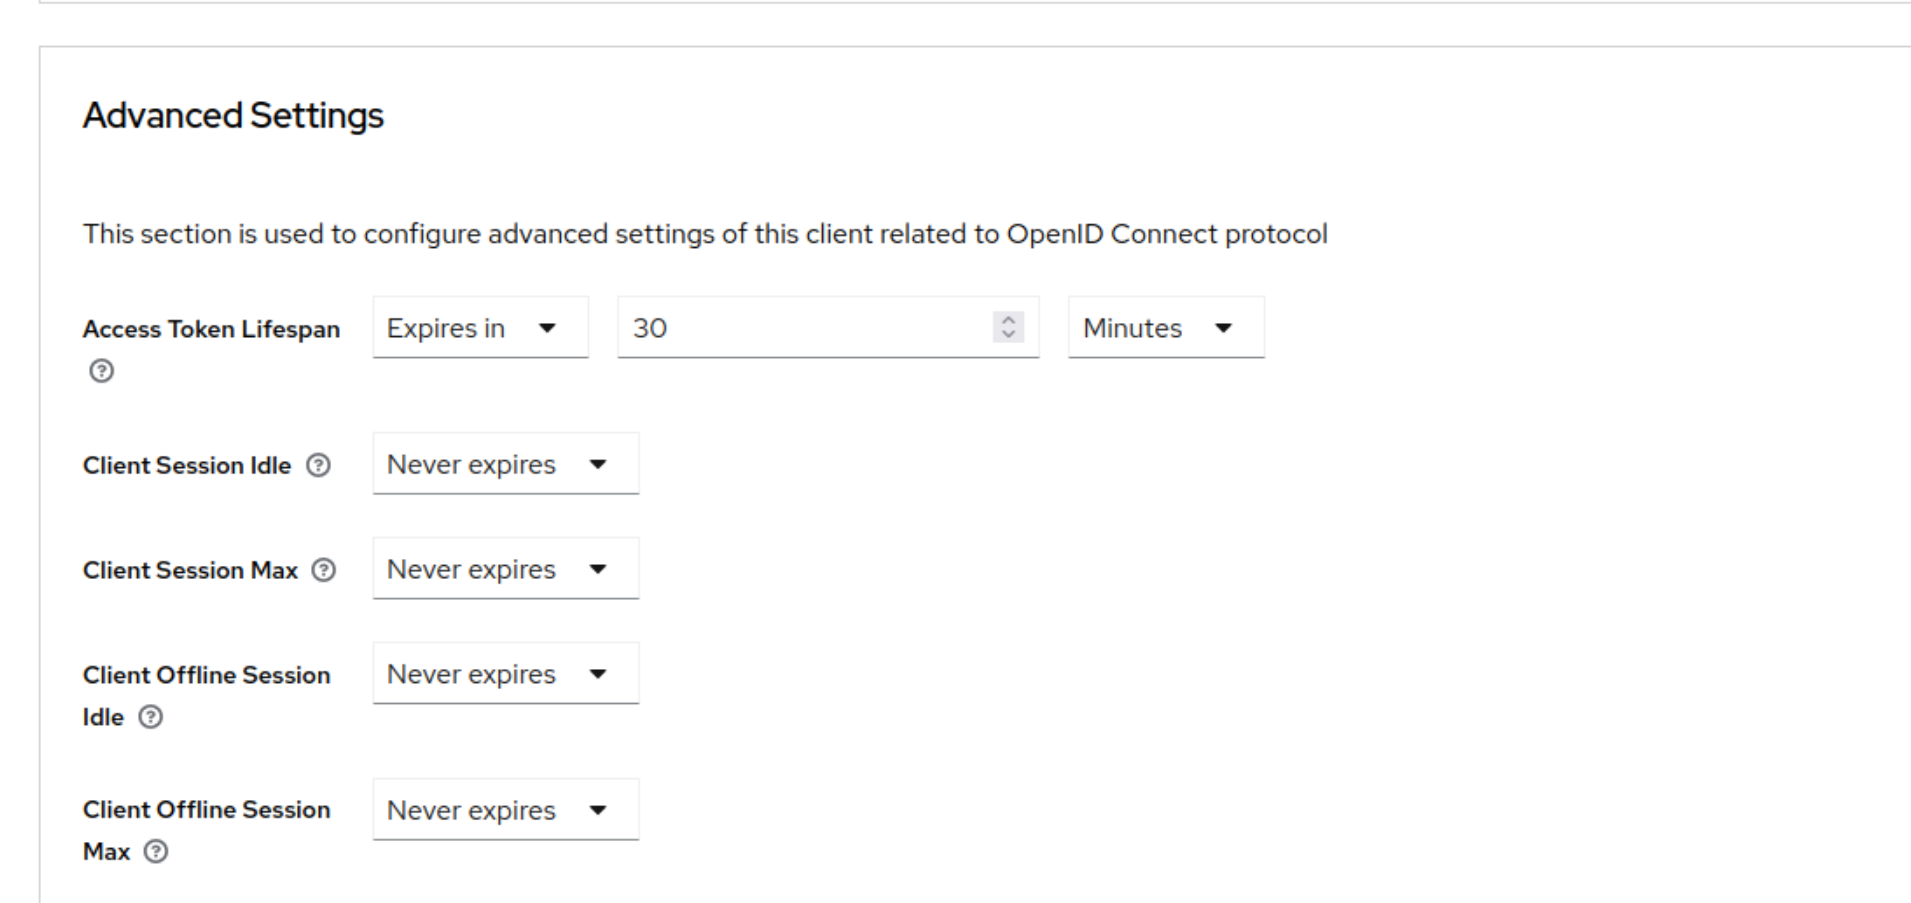
Enable refresh tokens in the Advanced tab of the OIDC client:
Set the Session and Access Token Lifespan in the Advanced tab:
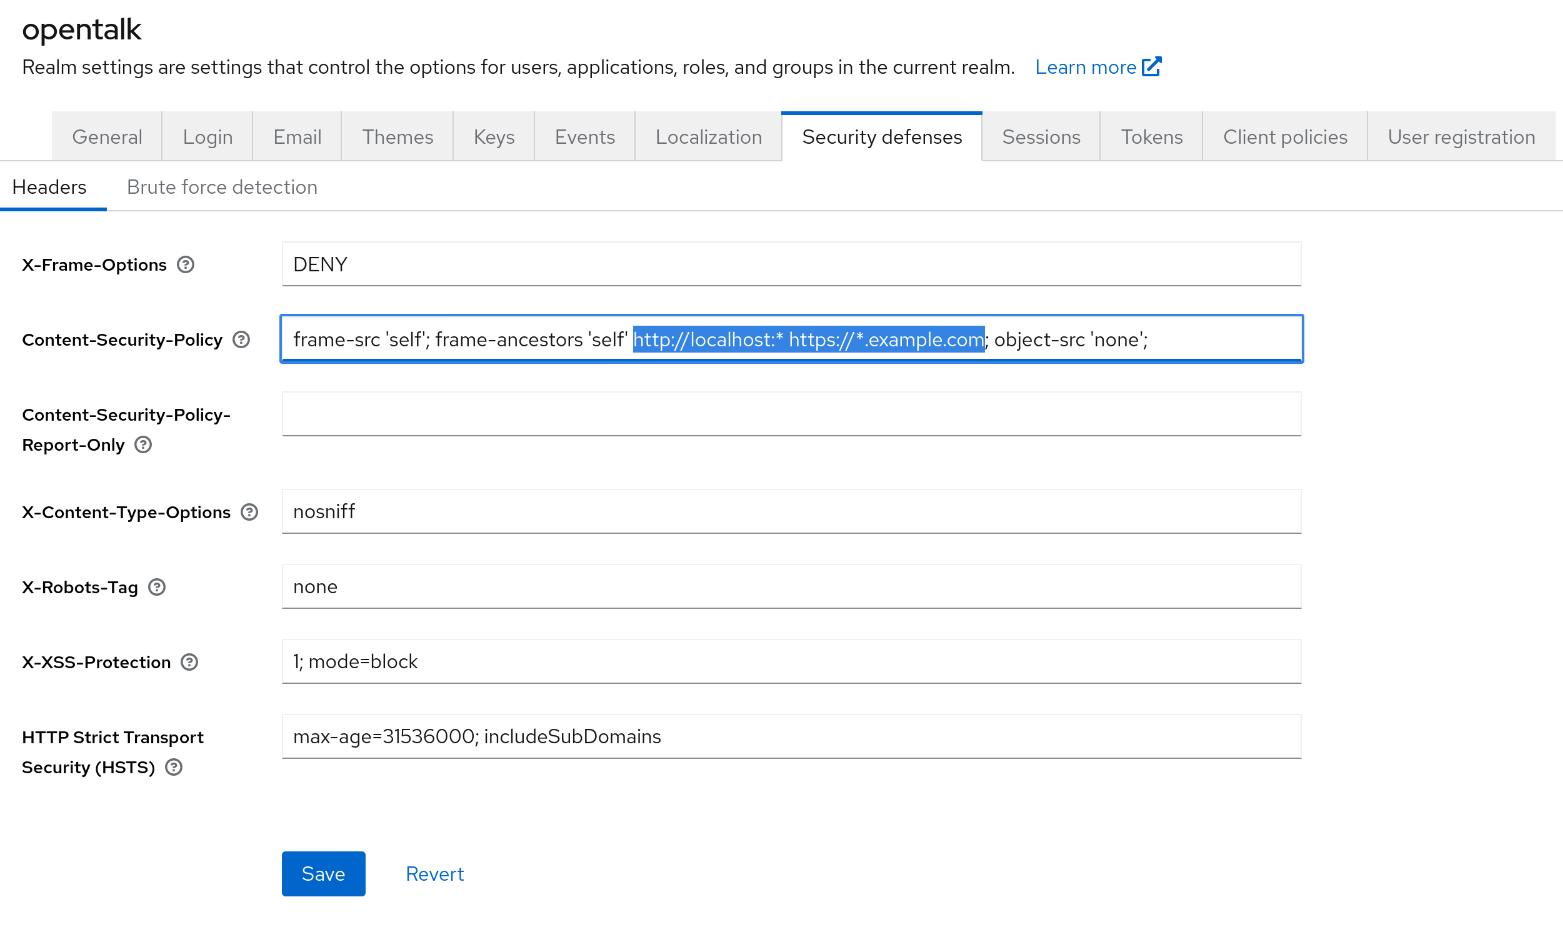
Add the OpenTalk domain to the Content-Security-Policy field in the Security defenses tab of the Realm settings:
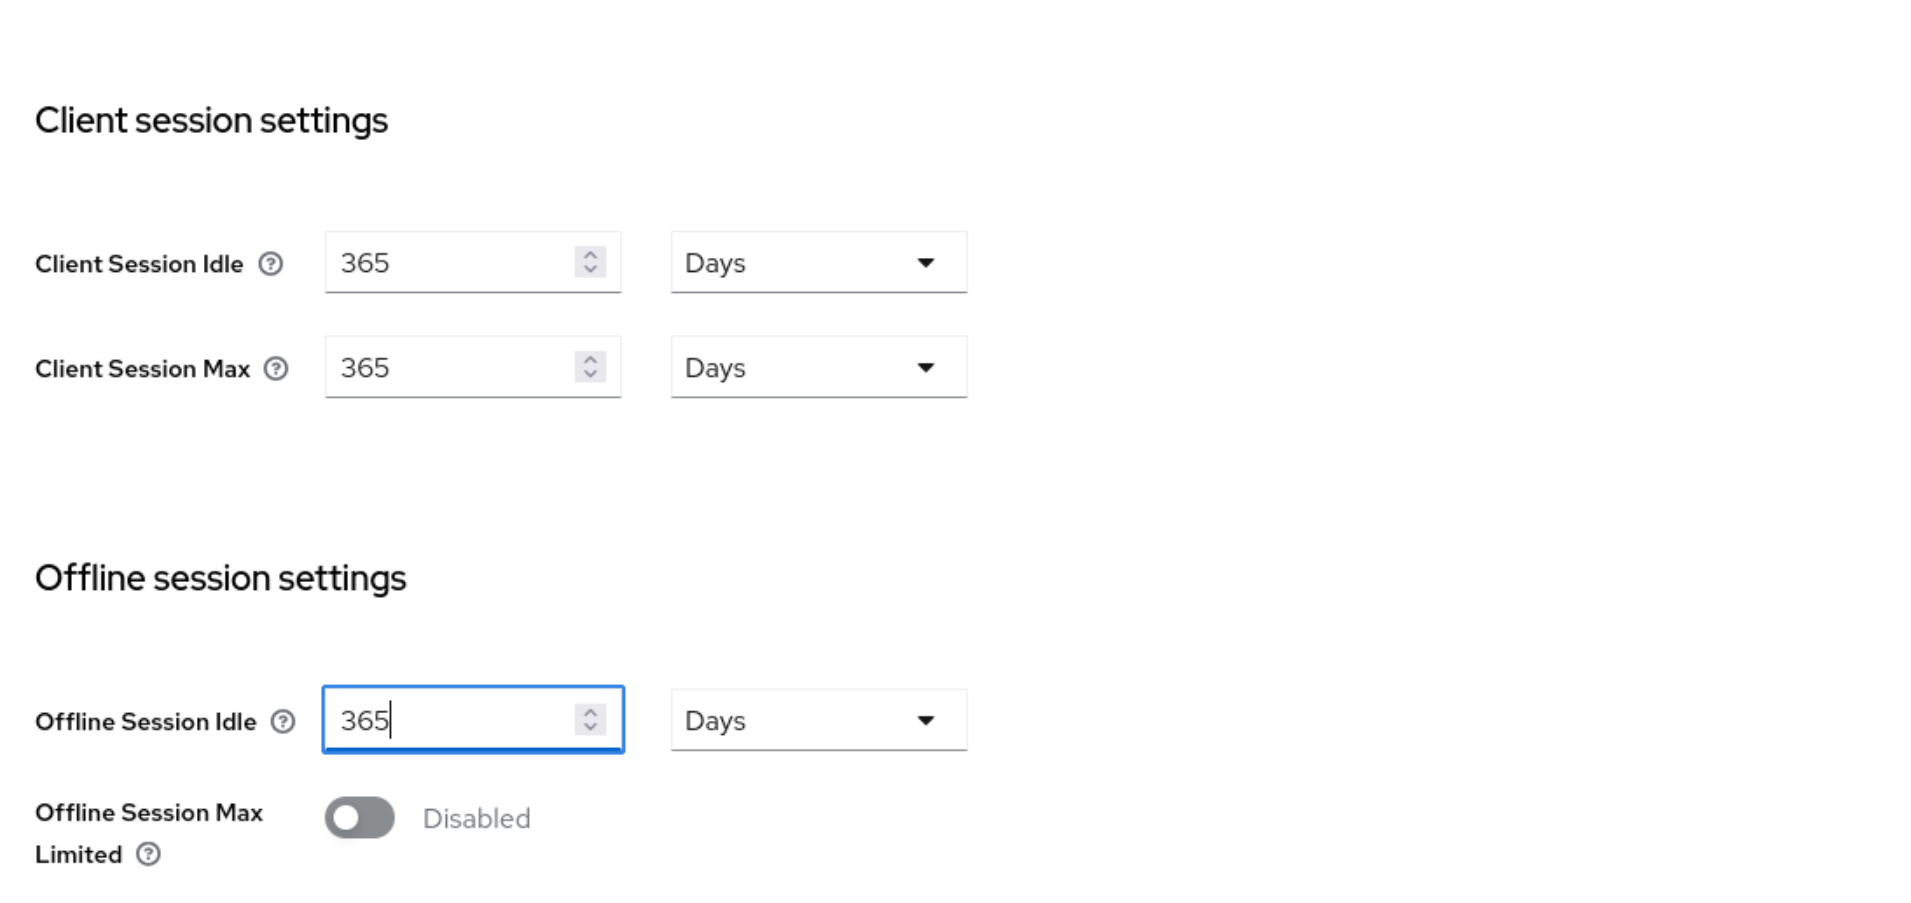
Set the timeouts in the Sessions tab of the Realm settings: